How To Use Custom Domain With Blogger: In this article, I will show you how to add a custom domain to a Blogspot blog. You need to follow the below step-by-step procedure to set up a custom domain for your blogger account.
You can also watch our full Hindi video tutorials regarding how to use a custom domain with Blogger properly at the end of this video.

Custom Domain With Blogger step-by-step tutorials
Step 1: Create a new blog in blogger. If you already have a Blogspot account you need to log in to it.
Step 2: Go to Blogger settings and turn off HTTPS redirections to avoid the HTTPS redirection issues.
Step 3: Now go to your domain registration account and unlock your domain if it is in locked condition.
Step 4: Click on the custom domain in Blogger settings and paste your custom domain name. Click on save.
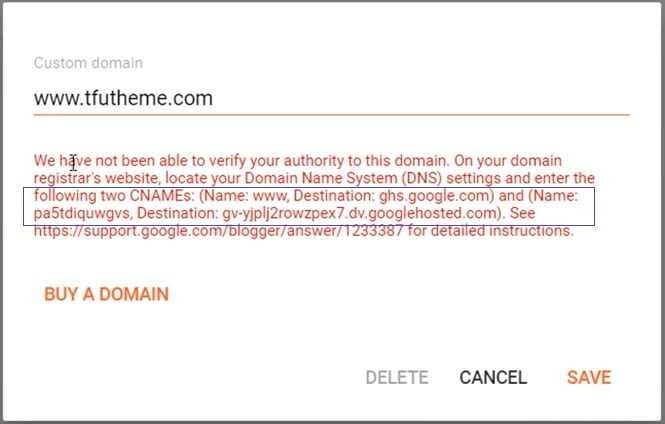
Step 5: Now you get two CNAME records as shown in the figure below.
Step 5: Copy one by one and paste them to your domain registration account and for that follow the steps below:
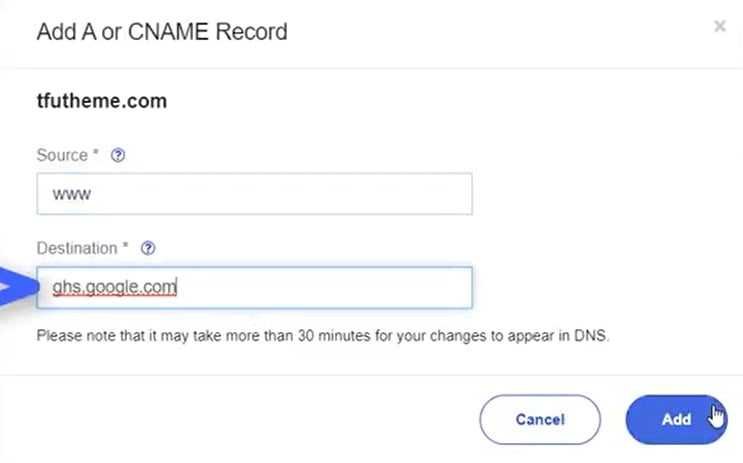
- To Add CNAME RECORDS 1: Copy and paste the source and destination address respectively to your domain registration account and click on add to add this record as shown in the figure.

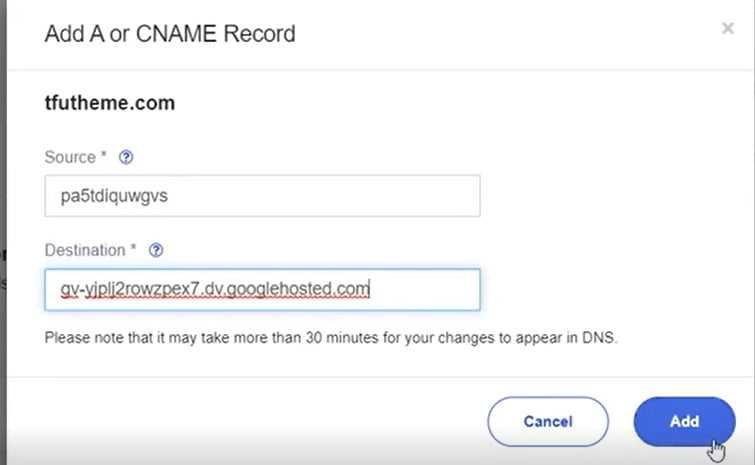
- To Add CNAME RECORDS 2: Again, Copy and paste the source and destination address respectively to your domain registration account and click on add to add this record as shown in the figure.

For Namecheap domain users:
If your domain is registered on Namecheap then you also need to add the 4 A records given below :
- A Records for @ pointing to
- 216.239.32.21
- 216.239.34.21
- 216.239.36.21
- 216.239.38.21
Step 6: Now Refresh your blogger without saving it and wait for 10 to 15 minutes (sometimes it takes longer than that within 24hrs.)
Step 7: Now go to the blogger setting
Step 8: Click on the custom domain again and paste your custom domain name.
Step 9: Now save it up. Now the custom domain is connected.
Step 10: Finally, go to Blogger settings and turn on HTTPS redirections.
Also Read: Top 10 Best Free Backlink Checker Tools 2023
Watch our full Hindi video tutorials regarding how to use a custom domain with Blogger properly.
In this video, I will show you how to Add Custom Domain to Blogger’s new interface and then how to enable an SSL certificate with Yahoo Small Business. I will tell you in detail, so do watch the video till the End.
Time Stamps:
00:00 Intro
01:16 Step1: Create a new blog on blogger
01:58 Step2: Connect blogger to Custom domain
03:08 Step3: How to unlock the domain
03:48 Step4: Setup Custom domain
07:37 Step5: Enable HTTPS
08:50 Step6: Conclusions
For the latest tech news & blogging Tutorials, follow TECH FOR U on Twitter, Facebook, and subscribe to our YouTube channel.
Read More:
- Google AdSense High CPC Countries List 2023
- Google Adsense Approval Complete Guide
- 5 Top Websites For Royalty Free and Copyright Free Photos
- How to create Privacy Policy Page For Your Website

